3.2 Smart Watch
The watch is a common item in life. Even though various electronic devices now have timing functions, and mobile phones can replace watches as timing tools, watches are still a popular item. They are not only timing tools, but also have fashion matching functions. Although watches are delicate and small, they involve complex craftsmanship. Now with XIAO and its expansion board, we can easily make them.
3.2.1 Background Knowledge
3.2.1.1 RTC Clock
RTC stands for Real_Time Clock, which is an integrated circuit used to display time, also called an RTC clock chip. RTCs are widely used, and we can find RTC in almost any electronic device. In the XIAO expansion board, there is an RTC clock chip, as shown in the following figure. We can display the date and time on the OLED display on the expansion board, and it can be powered by a button battery or lithium battery. Even if we disconnect, it can continue to track time. When we reconnect the power supply, we will find that the time is still moving. With the RTC clock, we can make timed reminder devices, such as timed watering, timed pet feeding, and so on.
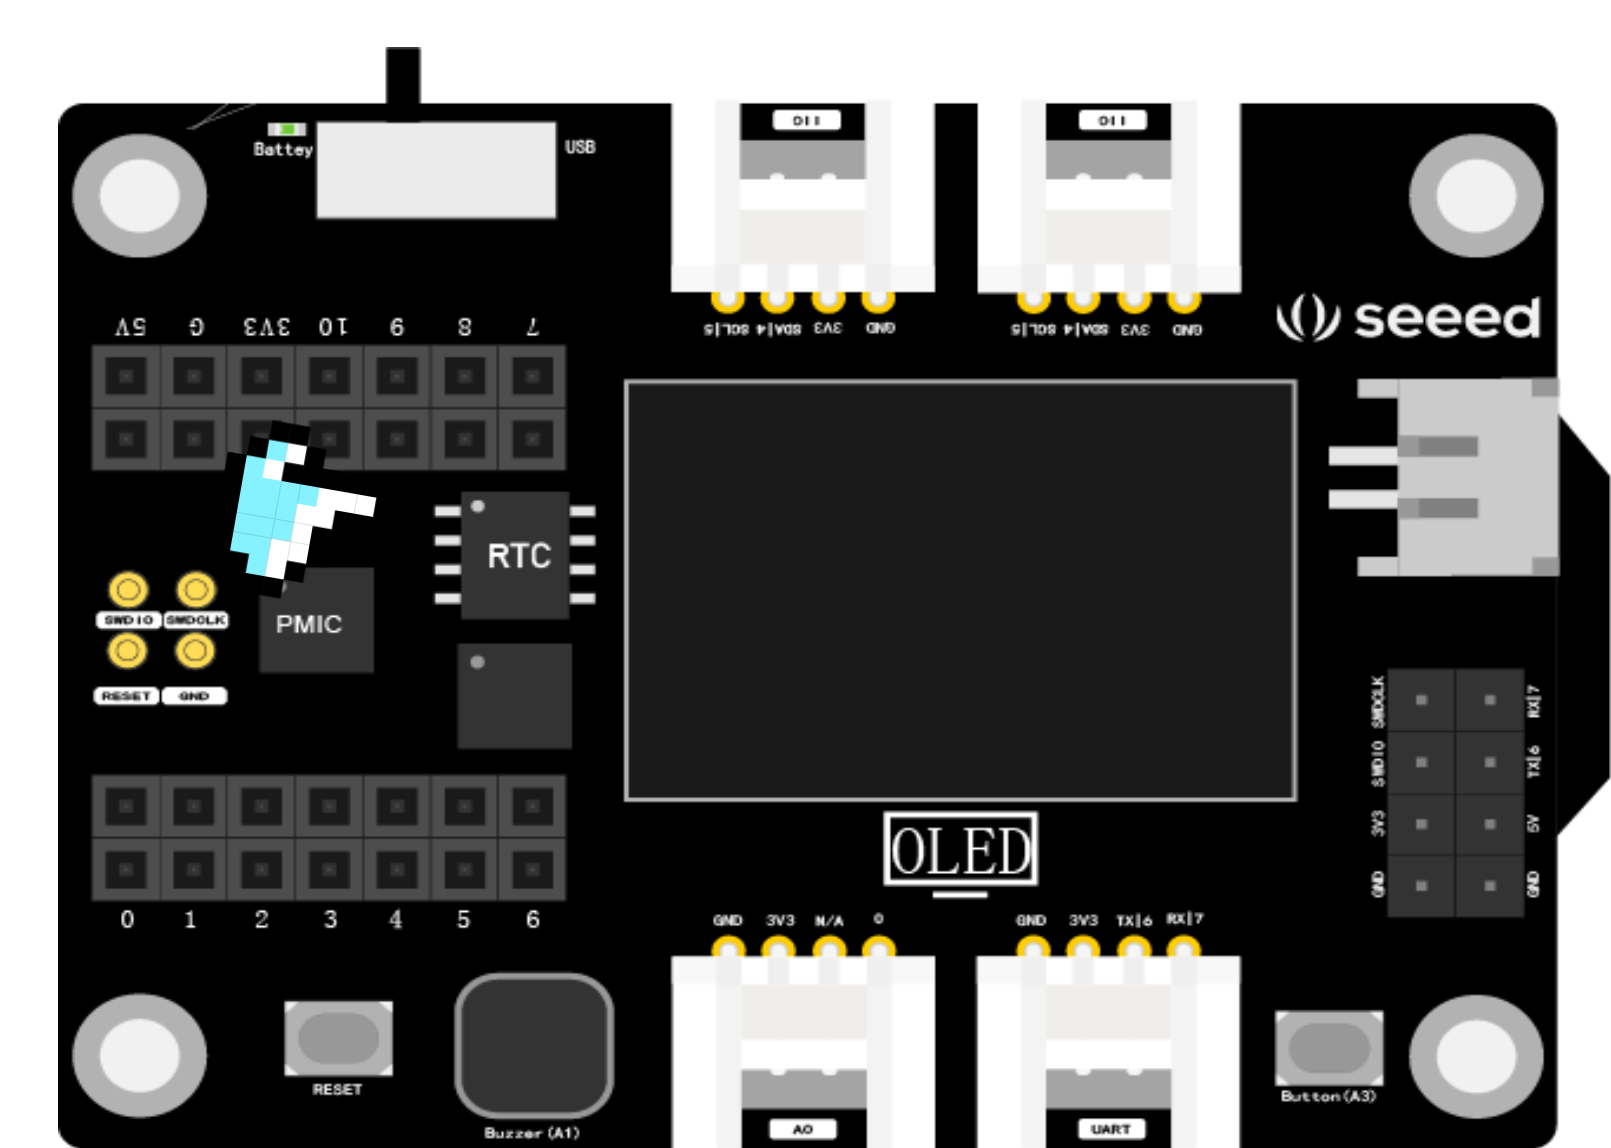
Position of the RTC clock chip on the XIAO expansion board
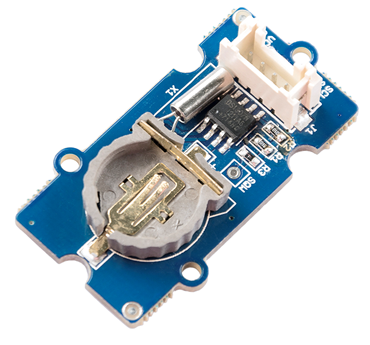
Grove RTC Module
3.2.2 Task 1: Displaying RTC Clock in the Serial Monitor
Adding PCF8563-Arduino-Library Library
Before starting to program the RTC on the XIAO expansion board with Arduino IDE, you need to add the necessary library files. Enter the library file address 🔗 https://github.com/Bill2462/PCF8563-Arduino-Library in the browser address bar, go to the GitHub page, click Code→Download ZIP to download the resource package PCF8563-Arduino-Library-master.zip to the local, as shown in the figure below.

Add the previously downloaded resource package PCF8563-Arduino-Library-master.zip in Sketch→Include Library→Add .ZIP Library in the menu bar until you see the library loading success prompt.
Opening the Sample File
Creating an RTC clock can’t be without the powerful library file. Open the simple example through the following path: File→Examples→PCF8563→simple. This example program can display the RCT clock through the serial monitor. After opening the example program, we only need to modify the current date and start time:
#include <PCF8563.h> //Declare library file
PCF8563 pcf;//Define variable pcf

void setup() {
    Serial.begin(9600);
    pcf.init();//Initialize the clock
    pcf.stopClock();//Stop the clock

    //Set the current date and time. After setting, it will start timing from this moment

    pcf.setYear(23);//Year
    pcf.setMonth(05);//Month
    pcf.setDay(29);//Day
    pcf.setHour(16);//Hour
    pcf.setMinut(10);//Minute
    pcf.setSecond(0);//Second

    pcf.startClock();//Clock starts timing
}

void loop() {
    Time nowTime = pcf.getTime();//Get time

    //Print the current date and time on the serial monitor
    Serial.print(nowTime.day);
    Serial.print("/");
    Serial.print(nowTime.month);
    Serial.print("/");
    Serial.print("20"); // Manually input the set year
    Serial.print(nowTime.year);
    Serial.print("/");
    Serial.print(nowTime.hour);
    Serial.print(":");
    Serial.print(nowTime.minute);
    Serial.print(":");
    Serial.println(nowTime.second);
    delay(1000);
}
Get this program from Github
https://github.com/mouseart/XIAO-Mastering-Arduino-and-TinyML/tree/main/code/L12_RTC_simple_XIAO_en
Without connecting other electronic modules, you can click the upload program button. After the code is uploaded, open the serial monitor, and you will be able to see the time.

3.2.3 Project Making: Smart Watch
Project Description
In this section, we are going to make a smart watch that can display the date, time, temperature, and humidity in real time. To display the date and time, we just need XIAO and the expansion board. To display the temperature and humidity, we need to add a temperature and humidity sensor.
Programming
The program consists of the following steps:
- Declare the necessary libraries and define variables.
- Initialize the libraries, and set the current time.
- Read temperature and humidity variables, get the current time, and display the temperature, humidity, and date/time on the OLED screen.
⚠️ Note
- Before starting to program for the OLED of the XIAO expansion board, make sure that the
U8g2_Arduinolibrary has been loaded into the Arduino IDE. The loading method can be referred to the instructions in the “How to Download and Install Arduino Libraries” section of Section 1.1.- Before starting to program for the Grove temperature and humidity sensor, make sure that the Arduino IDE has loaded the
Grove_Temperature_And_Humidity_Sensorlibrary. The loading method can be referred to the instructions in the “Adding the Grove_Temperature_And_Humidity_Sensor Library” section of Section 2.2.
Task 2: Display the current time and temperature/humidity values on the OLED display of the XIAO expansion board (based on the DHT20 sensor)
Step 1: Declare the necessary libraries and define variables.
#include <Arduino.h>
#include <U8x8lib.h> //use u8x8 library
#include <PCF8563.h> //RTC library
PCF8563 pcf; //define variable pcf
#include <Wire.h>
#include "DHT.h" //DHT library
#define DHTTYPE DHT20 //The type of the temperature and humidity sensor is DHT20
DHT dht(DHTTYPE);
U8X8_SSD1306_128X64_NONAME_HW_I2C u8x8(/* reset=*/ U8X8_PIN_NONE); //OLED's constructor, set data type, connect OLED display
Step 2: Initialize the libraries, and set the current time.
void setup() {
    Serial.begin(9600);
    u8x8.begin(); //u8x8 starts working
    u8x8.setFlipMode(1);
    Wire.begin();
    pcf.init(); //Initialize the clock
    pcf.stopClock(); //Stop the clock
    //Set the current time and date:
    pcf.setYear(23);
    pcf.setMonth(05);
    pcf.setDay(29);
    pcf.setHour(18);
    pcf.setMinut(53);
    pcf.setSecond(0);
    pcf.startClock(); //The clock starts timing
}
Step 3: Read temperature and humidity variables, get the current time, and display the temperature, humidity, and date/time on the OLED screen.
void loop() {
    float temp, humi; //Define temperature and humidity variables
    temp = dht.readTemperature(); //Read the temperature value
    humi = dht.readHumidity(); //Read the humidity value
    Time nowTime = pcf.getTime(); //Get the time
    u8x8.setFont(u8x8_font_chroma48medium8_r); //u8x8 font

    //Display the current date, time, temperature, and humidity at different coordinates on the OLED screen.
    u8x8.setCursor(0, 0);
    u8x8.print(nowTime.day);
    u8x8.print("/");
    u8x8.print(nowTime.month);
    u8x8.print("/");
    u8x8.print("20");
    u8x8.print(nowTime.year);
    u8x8.setCursor(0, 1);
    u8x8.print(nowTime.hour);
    u8x8.print(":");
    u8x8.print(nowTime.minute);
    u8x8.print(":");
    u8x8.println(nowTime.second);
    delay(1000);
    u8x8.setCursor(0, 2);
    u8x8.print("Temp:");
    u8x8.print(temp);
    u8x8.print("C");
    u8x8.setCursor(0,3);
    u8x8.print("Humidity:");
    u8x8.print(humi);
    u8x8.print("%");
    u8x8.refreshDisplay();
    delay(200);
}
For the complete program, please refer to:
#include <Arduino.h>
#include <U8x8lib.h> //use u8x8 library
#include <PCF8563.h> //RTC library
PCF8563 pcf; //define variable pcf
#include <Wire.h>
#include "DHT.h" //DHT library
#define DHTTYPE DHT20 //The type of the temperature and humidity sensor is DHT20
DHT dht(DHTTYPE);
U8X8_SSD1306_128X64_NONAME_HW_I2C u8x8(/* reset=*/ U8X8_PIN_NONE); //OLED's constructor, set data type, connect OLED display

void setup() {
    Serial.begin(9600);
    u8x8.begin(); //u8x8 starts working
    u8x8.setFlipMode(1);
    Wire.begin();
    pcf.init(); //Initialize the clock
    pcf.stopClock(); //Stop the clock
    //Set the current time and date:
    pcf.setYear(23);
    pcf.setMonth(05);
    pcf.setDay(29);
    pcf.setHour(18);
    pcf.setMinut(53);
    pcf.setSecond(0);
    pcf.startClock(); //The clock starts timing
}
void loop() {
    float temp, humi; //Define temperature and humidity variables
    temp = dht.readTemperature(); //Read the temperature value
    humi = dht.readHumidity(); //Read the humidity value
    Time nowTime = pcf.getTime(); //Get the time
    u8x8.setFont(u8x8_font_chroma48medium8_r); //u8x8 font

    //Display the current date, time, temperature, and humidity at different coordinates on the OLED screen.
    u8x8.setCursor(0, 0);
    u8x8.print(nowTime.day);
    u8x8.print("/");
    u8x8.print(nowTime.month);
    u8x8.print("/");
    u8x8.print("20");
    u8x8.print(nowTime.year);
    u8x8.setCursor(0, 1);
    u8x8.print(nowTime.hour);
    u8x8.print(":");
    u8x8.print(nowTime.minute);
    u8x8.print(":");
    u8x8.println(nowTime.second);
    delay(1000);
    u8x8.setCursor(0, 2);
    u8x8.print("Temp:");
    u8x8.print(temp);
    u8x8.print("C");
    u8x8.setCursor(0,3);
    u8x8.print("Humidity:");
    u8x8.print(humi);
    u8x8.print("%");
    u8x8.refreshDisplay();
    delay(200);
}
Get this program from Github
https://github.com/mouseart/XIAO-Mastering-Arduino-and-TinyML/tree/main/code/L12_SmartWatch_DHT20_XIAO_en
Step 4: Connect the hardware and upload the program. First, connect the DHT20 temperature and humidity sensor to the I2C interface of the XIAO expansion board, and connect the XIAO to the computer with a data cable, as shown in the picture:

Click the “Upload” button in the Arduino IDE to upload the program to the hardware. When the debugging area shows “Upload successful”, observe whether the OLED display correctly outputs the current time and starts timing, as well as the real-time temperature and humidity.

Task 3: Display the current time and temperature and humidity values on the OLED display of the XIAO expansion board (based on the DHT11 sensor)
If you are using the Grove DHT11 temperature and humidity sensor with a blue casing, part of the program code needs to be modified as follows:
#define DHTPIN 0, this needs to be modified according to the actual pin number to which the temperature and humidity sensor is connected.
#define DHTTYPE DHT11, since there are different models of temperature and humidity sensors, you need to select the correct model — DHT11. The modified example code is as follows:
#include <Arduino.h>
#include <U8x8lib.h>
#include <PCF8563.h>
PCF8563 pcf;
#include <Wire.h>
#include "DHT.h"
#define DHTPIN 0
#define DHTTYPE DHT11
DHT dht(DHTPIN, DHTTYPE);
U8X8_SSD1306_128X64_NONAME_HW_I2C u8x8(/* reset=*/ U8X8_PIN_NONE);
//U8X8_SSD1306_128X64_NONAME_SW_I2C u8x8(/* clock=*/ SCL, /* data=*/ SDA, /* reset=*/ U8X8_PIN_NONE);   // OLEDs without Reset of the Display

void setup() {
  Serial.begin(115200);
  u8x8.begin();
  u8x8.setFlipMode(1);
  Wire.begin();
  pcf.init(); //initialize the clock
  pcf.stopClock(); //stop the clock
  pcf.setYear(23); //set year
  pcf.setMonth(05); //set month
  pcf.setDay(29); //set date
  pcf.setHour(18); //set hour
  pcf.setMinut(53); //set minute
  pcf.setSecond(0); //set second
  pcf.startClock(); //start the clock
}

void loop() {
  float temp, humi;
  temp = dht.readTemperature();
  humi = dht.readHumidity();
  Time nowTime = pcf.getTime(); //get current time
  u8x8.setFont(u8x8_font_chroma48medium8_r);   // choose a suitable font

  u8x8.setCursor(0, 0);
  u8x8.print(nowTime.day);
  u8x8.print("/");
  u8x8.print(nowTime.month);
  u8x8.print("/");
  u8x8.print("20");
  u8x8.print(nowTime.year);
  u8x8.setCursor(0, 1);
  u8x8.print(nowTime.hour);
  u8x8.print(":");
  u8x8.print(nowTime.minute);
  u8x8.print(":");
  u8x8.println(nowTime.second);
  delay(1000);
  u8x8.setCursor(0, 2);
  u8x8.print("Temp:");
  u8x8.print(temp);
  u8x8.print("C");
  u8x8.setCursor(0,3);
  u8x8.print("Humidity:");
  u8x8.print(humi);
  u8x8.print("%");
  u8x8.refreshDisplay();
  delay(200);
}
Get this program from Github
https://github.com/mouseart/XIAO-Mastering-Arduino-and-TinyML/tree/main/code/L12_SmartWatch_DHT11_XIAO_en
After modifying the code, first connect the DHT11 temperature and humidity sensor to the A0 interface of the XIAO expansion board, as shown in the image below.

Then connect the XIAO development board to your computer, upload the modified sample program to the XIAO via Arduino IDE, and you should be able to see the time, temperature, and humidity readings on the OLED of the XIAO expansion board. You can place the temperature and humidity sensor in different environments to observe changes in temperature and humidity readings.

3.2.4 Exterior Design
Given its compact size, XIAO is especially suitable for creating wearable devices. The expansion board incorporates an RTC chip, a buzzer, and an OLED display screen, which means you can create a variety of applications even without adding other modules. In this section, we have made a smart watch using the on-board OLED display, RTC chip, and an external temperature and humidity sensor. When creating the appearance, we only need to consider wearability, organization of modules and connecting wires, and the exposure of the OLED display screen. As shown below, we provide a wearable watch style and the laser cutting files for it. With just a simple installation, your wearable device is ready.

Download files for laser cutting machine 🔗
https://github.com/mouseart/XIAO-Mastering-Arduino-and-TinyML/blob/main/dxf/XIAO_X_watch.dxf.


