1.6 Displaying “Hello World” on OLED
In our daily life, we see displays everywhere - televisions, computers, phones, car displays, LCD billboards in shopping malls… Without a variety of screens, our lives would lose much of its fun. Of course, these screens, besides leisure and entertainment, are also indispensable tools for daily life. Common displays include LCD displays, OLED displays, etc. They all have their own strengths and weaknesses as display devices and can be applied in different fields and scenarios. The XIAO expansion board integrates an OLED display. In this lesson, we will learn how to use OLED to display text, patterns, and images.
1.6.1 Background Knowledge
1.6.1.1 OLED Display
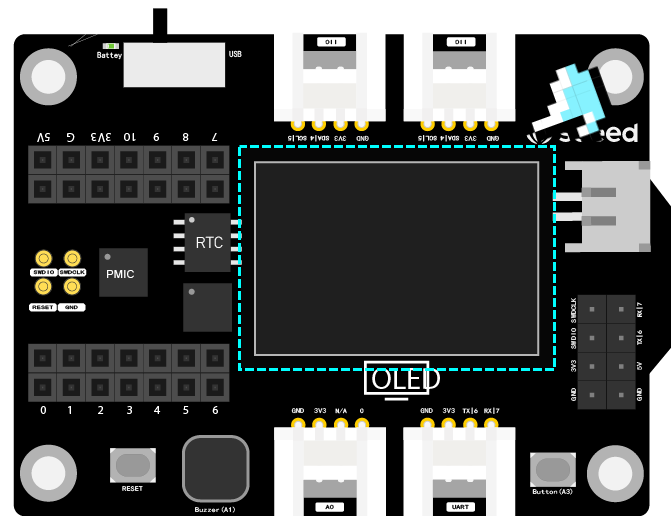
OLED, also known as Organic Light Emitting Diode, has advantages such as self-luminous, low power consumption, fast response speed, high resolution, light weight, etc. Its application field is very wide. The XIAO expansion board integrates a 0.96 inch 128x64 pixel OLED display, which can be used directly without wiring. During project production, we can display time, temperature and humidity, and other sensor return values through the OLED display, and we can also directly display letters, numbers, graphics, and even patterns, achieving visual interactive effects.
1.6.1.2 How to Download and Install the U8g2_Arduino Library
A library is a collection of program codes, which encapsulates some commonly used functions into a file for users to call. When we use OLED displays, temperature and humidity sensors, etc., we need to use the corresponding libraries. Where can these libraries be downloaded and how to install them? We will explain using the U8g2_Arduino library file of the OLED display as an example. Enter the website link 🔗 https://github.com/olikraus/u8g2_arduino to enter the GitHub page, click Code→Download ZIP to download the resource package to the local, as shown in the figure below.

After the download is complete, open the Arduino IDE, click Sketch→Include Library→Add .ZIP Library, and select the ZIP file you just downloaded.
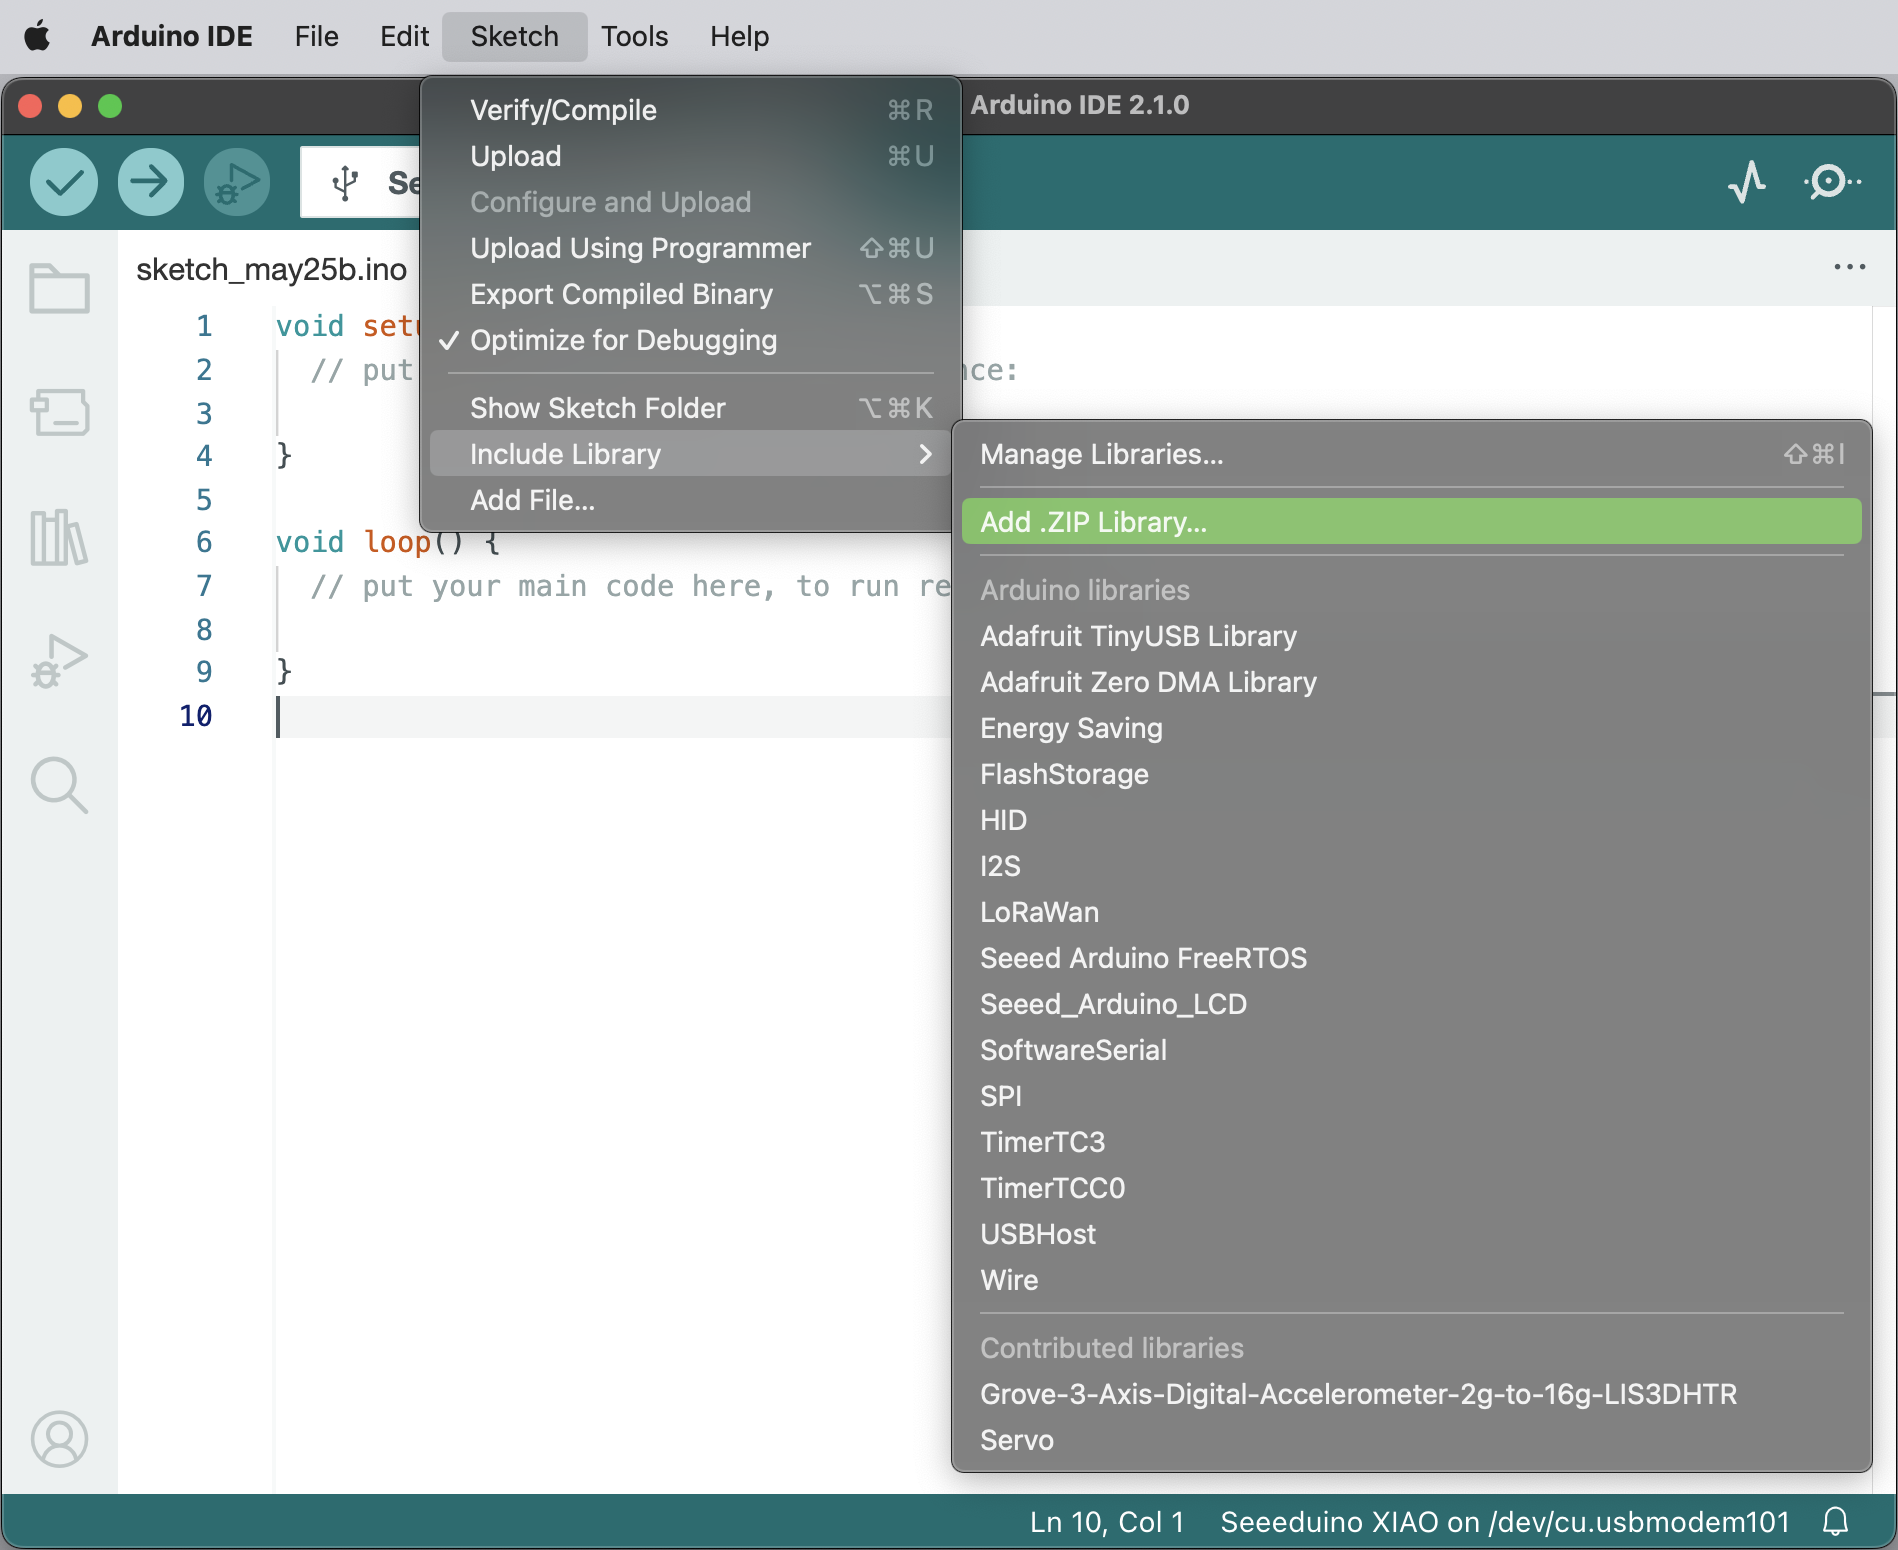
If the library is installed correctly, you can see the prompt information for successful library installation in the output window.
1.6.1.3 U8g2 Library for OLED
U8g2 is a monochrome graphics library for embedded devices, which supports various types of OLED displays, making it easy for us to write programs to achieve the desired effects. The U8g2 library also includes the U8x8 library, and the two libraries have different functions:
U8g2
Includes all graphic procedures (line/box/circle drawing); Supports various fonts, (almost) no restrictions on font height; Some memory in the microcontroller is needed to display.
U8x8
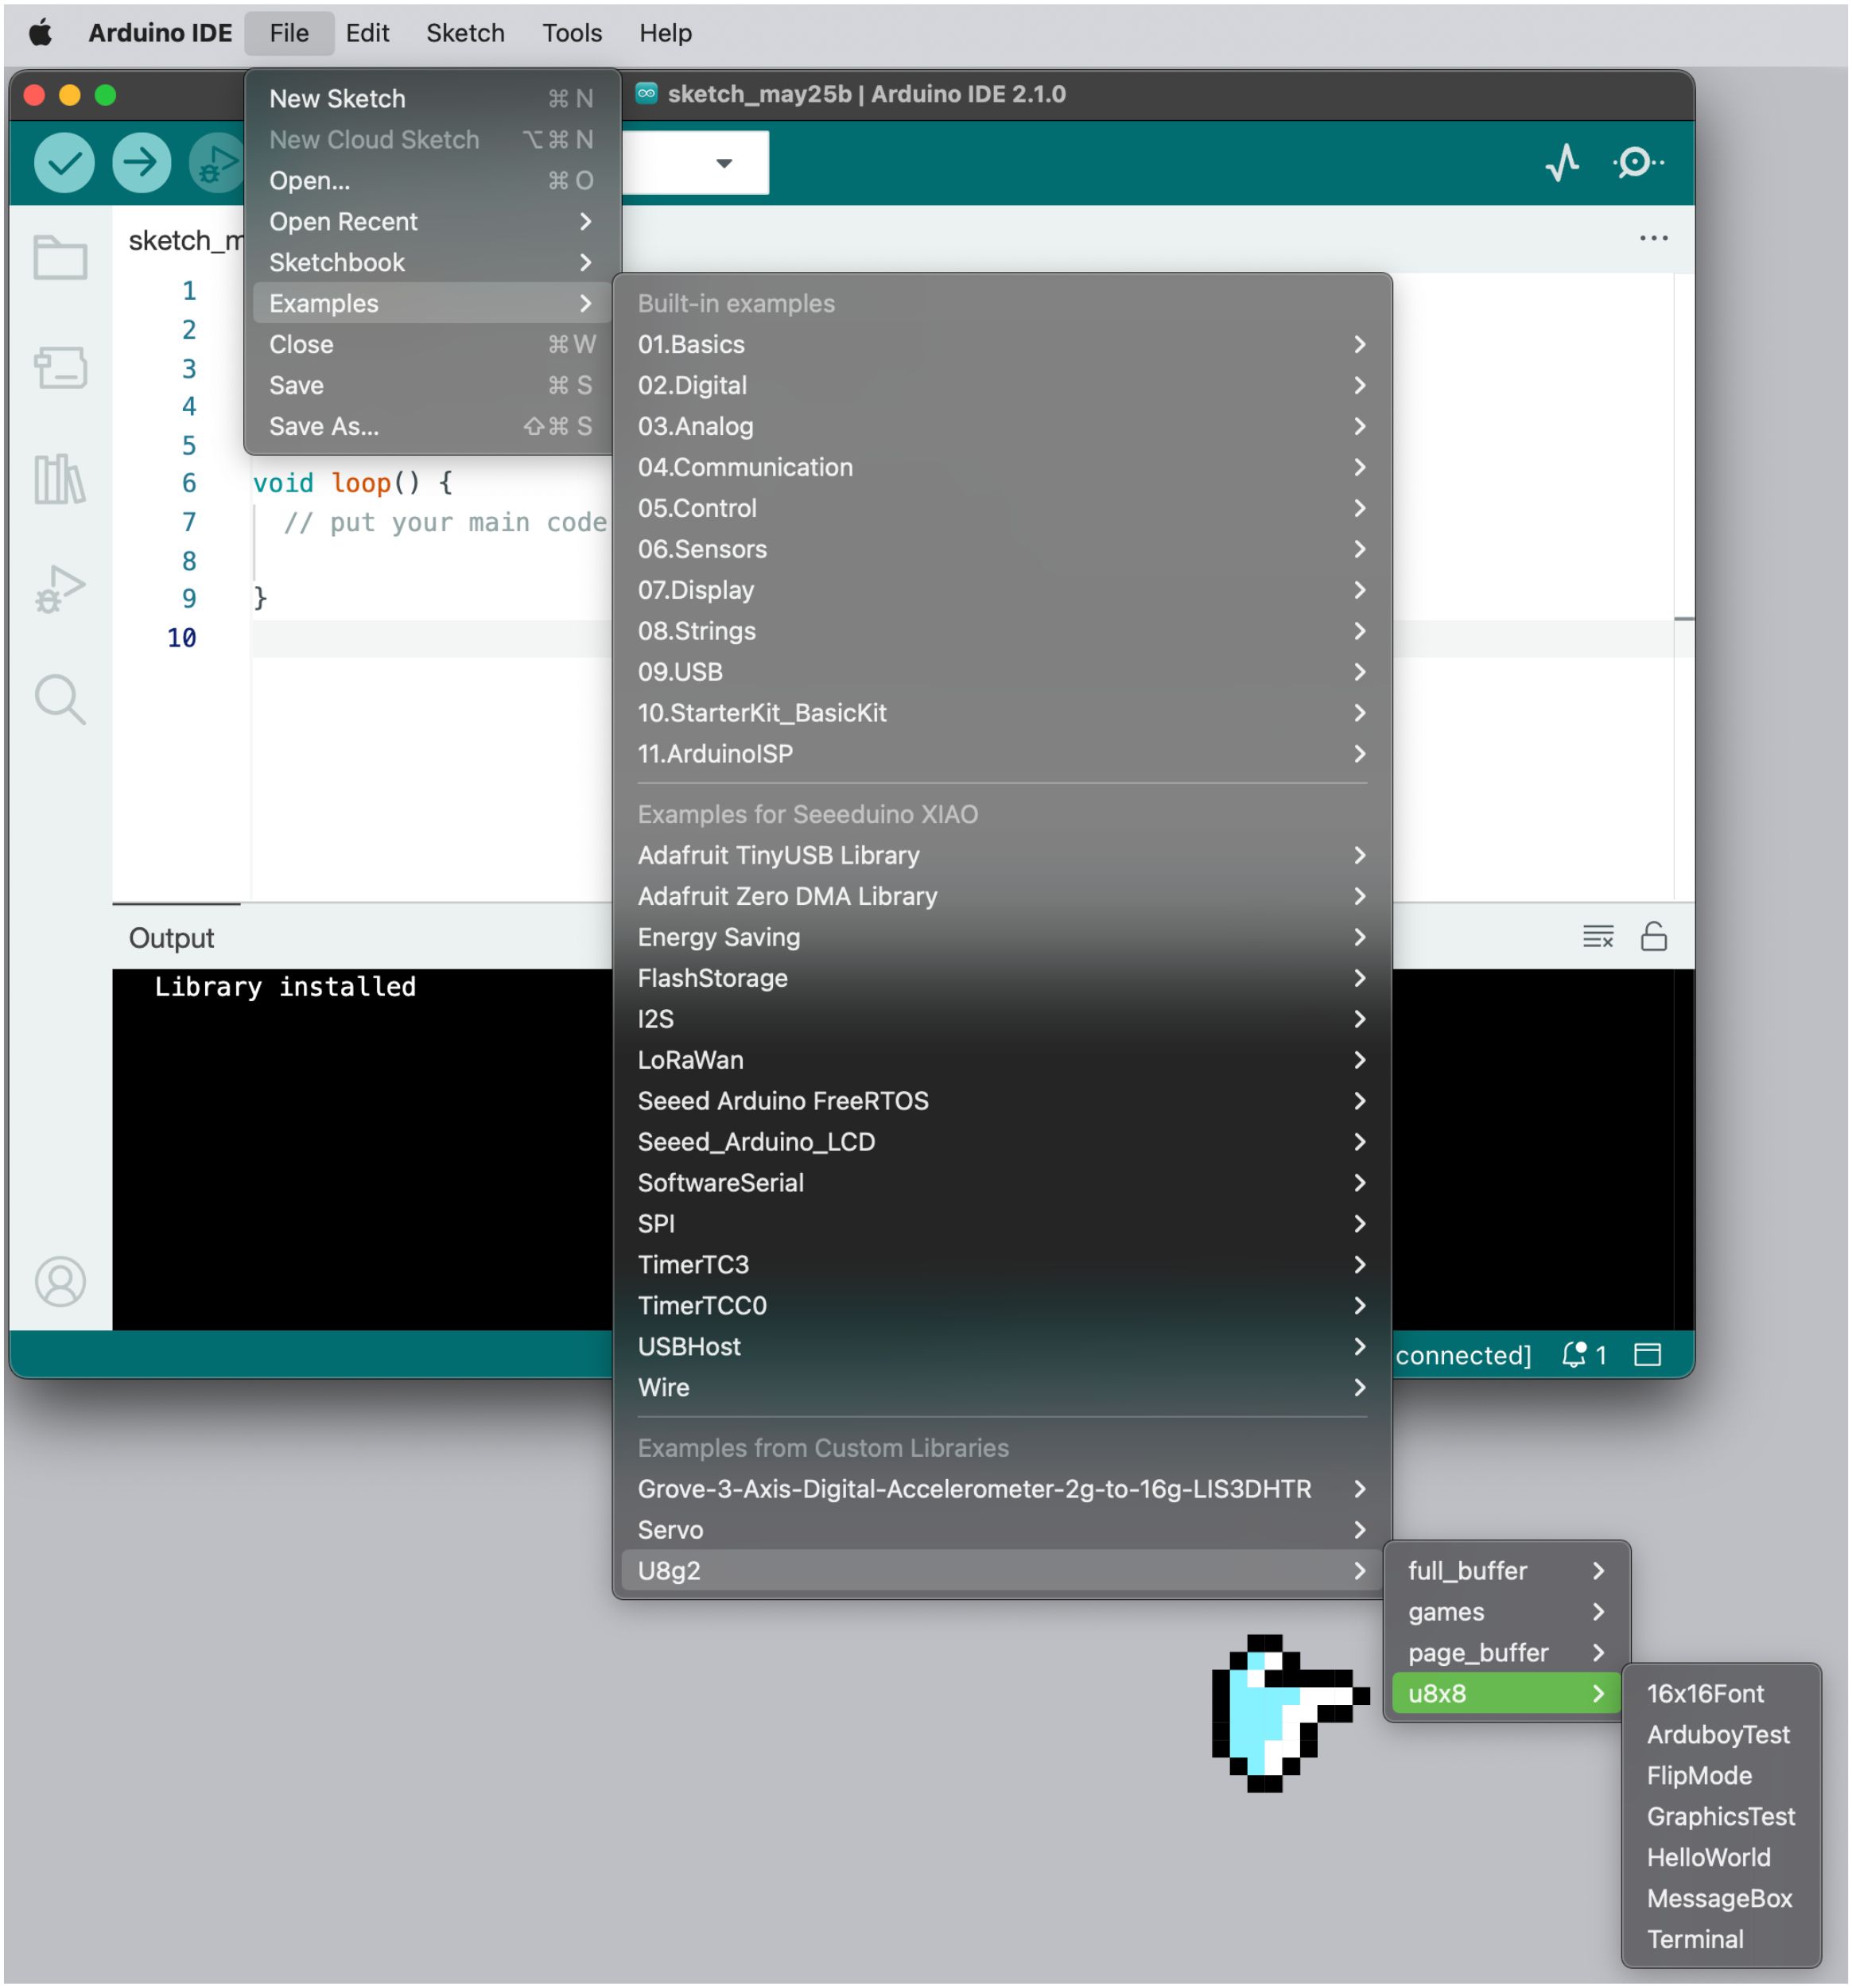
Only supports text (character) output; Only allows each character to use a fixed-size font (8x8 pixels); Writes directly to the display, no buffer is needed in the microcontroller. Simply put, when we want the OLED display to display various fonts, graphics, patterns, and present visual content more flexibly, we can use the U8g2 library; when we want to display characters more directly, with no font requirements, just to display sensor values, time, etc., we can use the U8x8 library, which is more efficient. We can find many example programs in “File→Examples→U8g2”, and familiarize ourselves with the use of the library through the example programs.
Next, we will display characters and draw circles using two libraries respectively.
1.6.2 Task 1: Display Hello World! on the OLED of the XIAO expansion board
⚠️ Note Before starting to write a program for the OLED of the XIAO expansion board, make sure the Arduino IDE has loaded the
U8g2_Arduinolibrary file. The loading method can be referred to the description in the “How to Download and Install Arduino Library” section of this lesson.
Analysis
If you just want to display “Hello World!” on the OLED, you can directly write characters with the U8x8 library. The steps are as follows:
- Declare the library file, set the constructor, and the constructor defines the display type, controller, RAM buffer size, and communication protocol.
- Initialize the display.
- Set the display font, set the print starting position, and output “Hello World!”.
Write the program
Step 1: Declare the library file, set the constructor, and the constructor defines the display type, controller, RAM buffer size, and communication protocol.
#include <Arduino.h>
#include <U8x8lib.h>//Use U8x8 library file
U8X8_SSD1306_128X64_NONAME_HW_I2C u8x8(/* reset=*/ U8X8_PIN_NONE);
//Set the constructor, define the display type, controller, RAM buffer size, and communication protocol, generally determine according to the used display model
Step 2: Initialize the display. After declaring the library file in the previous step, you can use the functions in the library to set the OLED display.
void setup(void) {
    u8x8.begin();//Initialize u8x8 library
    u8x8.setFlipMode(1);//Flip the display 180 degrees, generally numbers 0 and 1
}
Step 3: Set the display font (there are various fonts to choose from in the u8x8 library, we can refer to https://github.com/olikraus/u8g2/wiki/fntlist8x8 to choose), set the print starting position, and output “Hello World!”.
void loop(void) {
    u8x8.setFont(u8x8_font_chroma48medium8_r);//Define u8x8 font
    u8x8.setCursor(0, 0);//Set the position of the drawing cursor
    u8x8.print("Hello World!");//Draw content on OLED: Hello World!
}
The complete program is as follows:
#include <Arduino.h>
#include <U8x8lib.h>//Use U8x8 library file
U8X8_SSD1306_128X64_NONAME_HW_I2C u8x8(/* reset=*/ U8X8_PIN_NONE);
//Set the constructor, define the display type, controller, RAM buffer size, and communication protocol, generally determine according to the used display model

void setup(void) {
    u8x8.begin();//Initialize u8x8 library
    u8x8.setFlipMode(1);//Flip the display 180 degrees, generally numbers 0 and 1
}

void loop(void) {
    u8x8.setFont(u8x8_font_chroma48medium8_r);//Define u8x8 font
    u8x8.setCursor(0, 0);//Set the position of the drawing cursor
    u8x8.print("Hello World!");//Draw content on OLED: Hello World!
}
Get this program from Github https://github.com/mouseart/XIAO-Mastering-Arduino-and-TinyML/tree/main/code/L6_HelloWorld_XIAO_en
Program Upload:
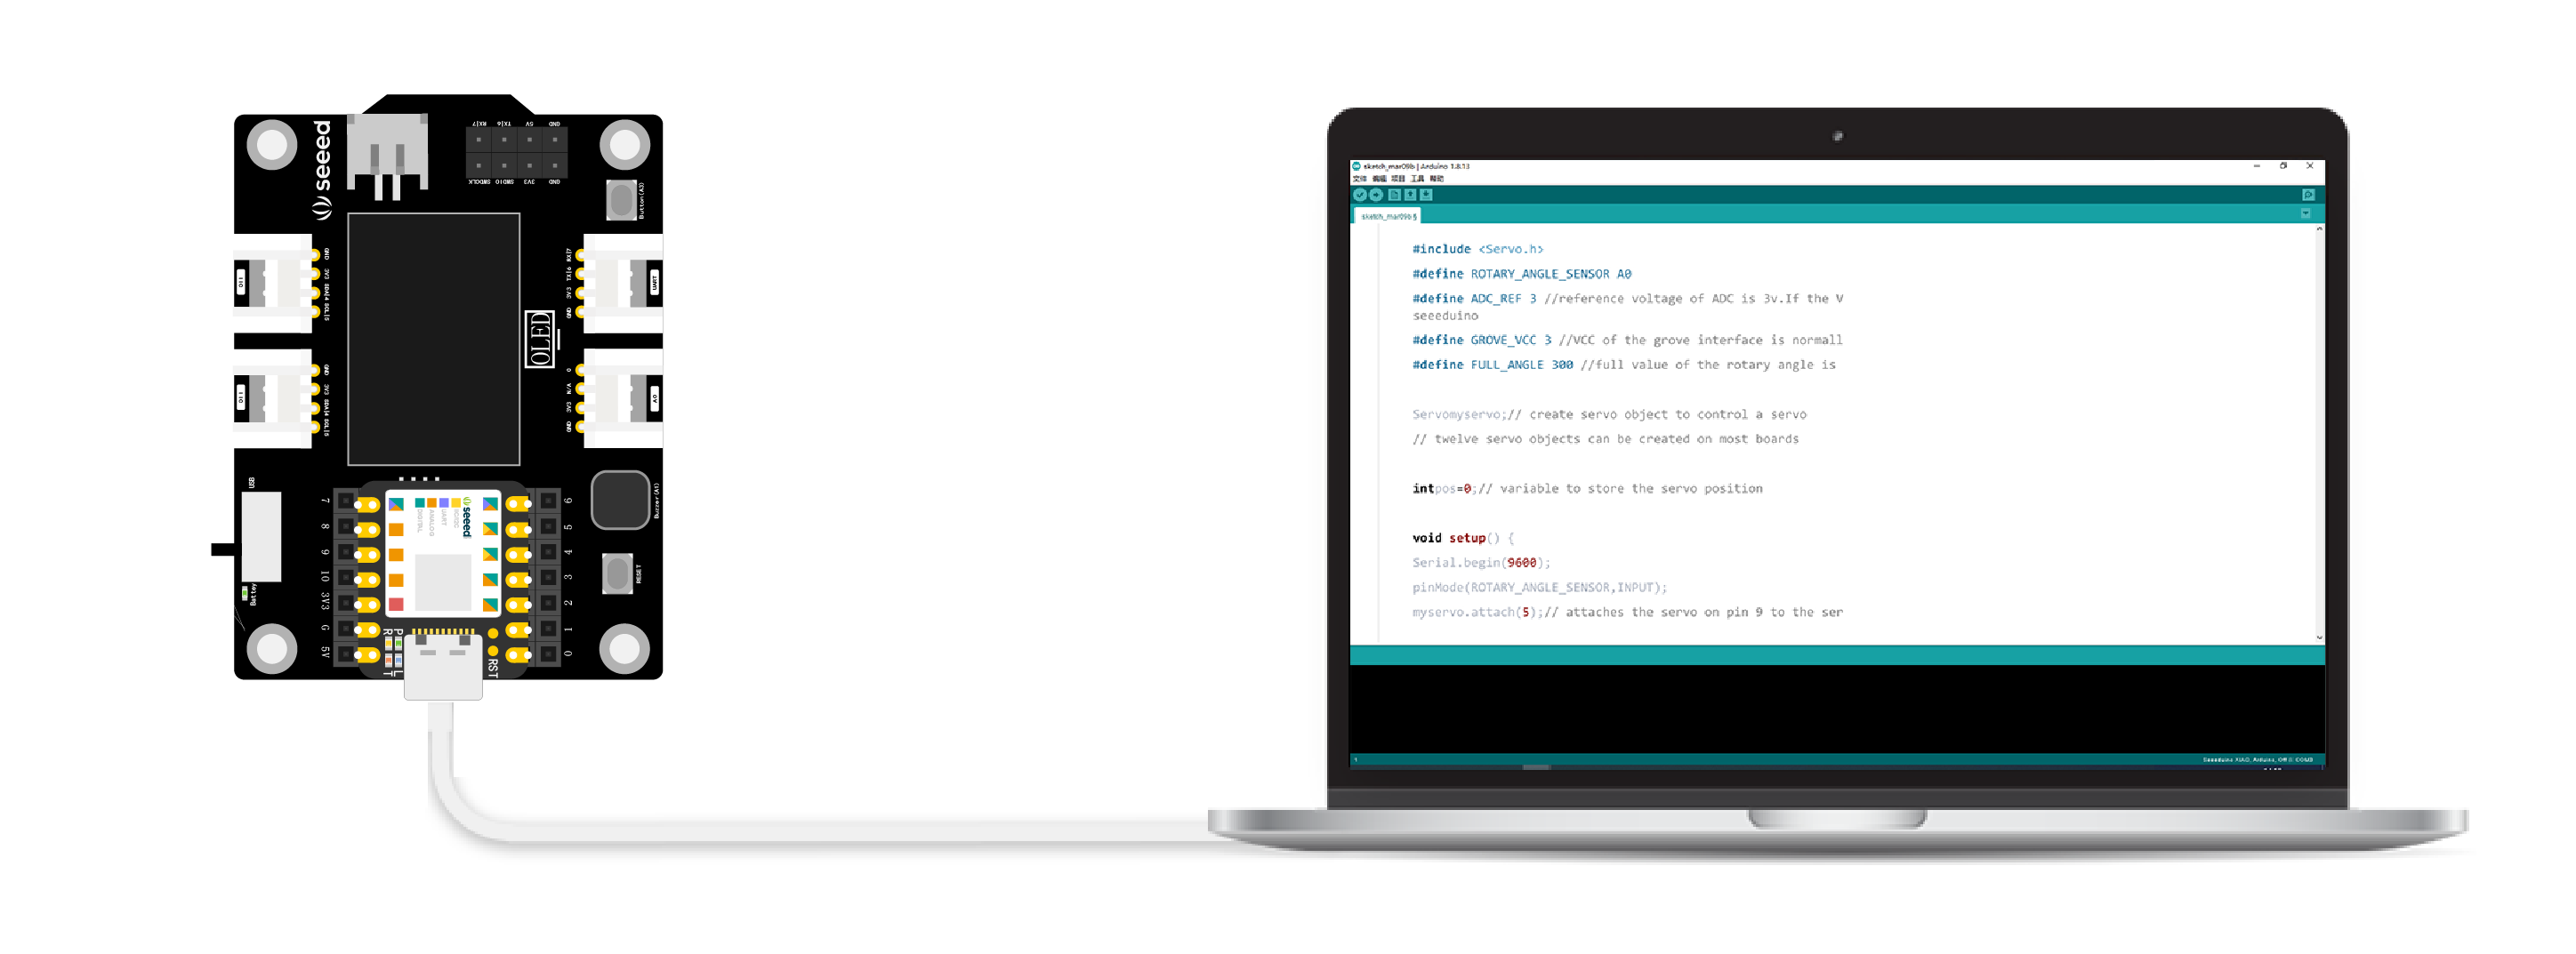
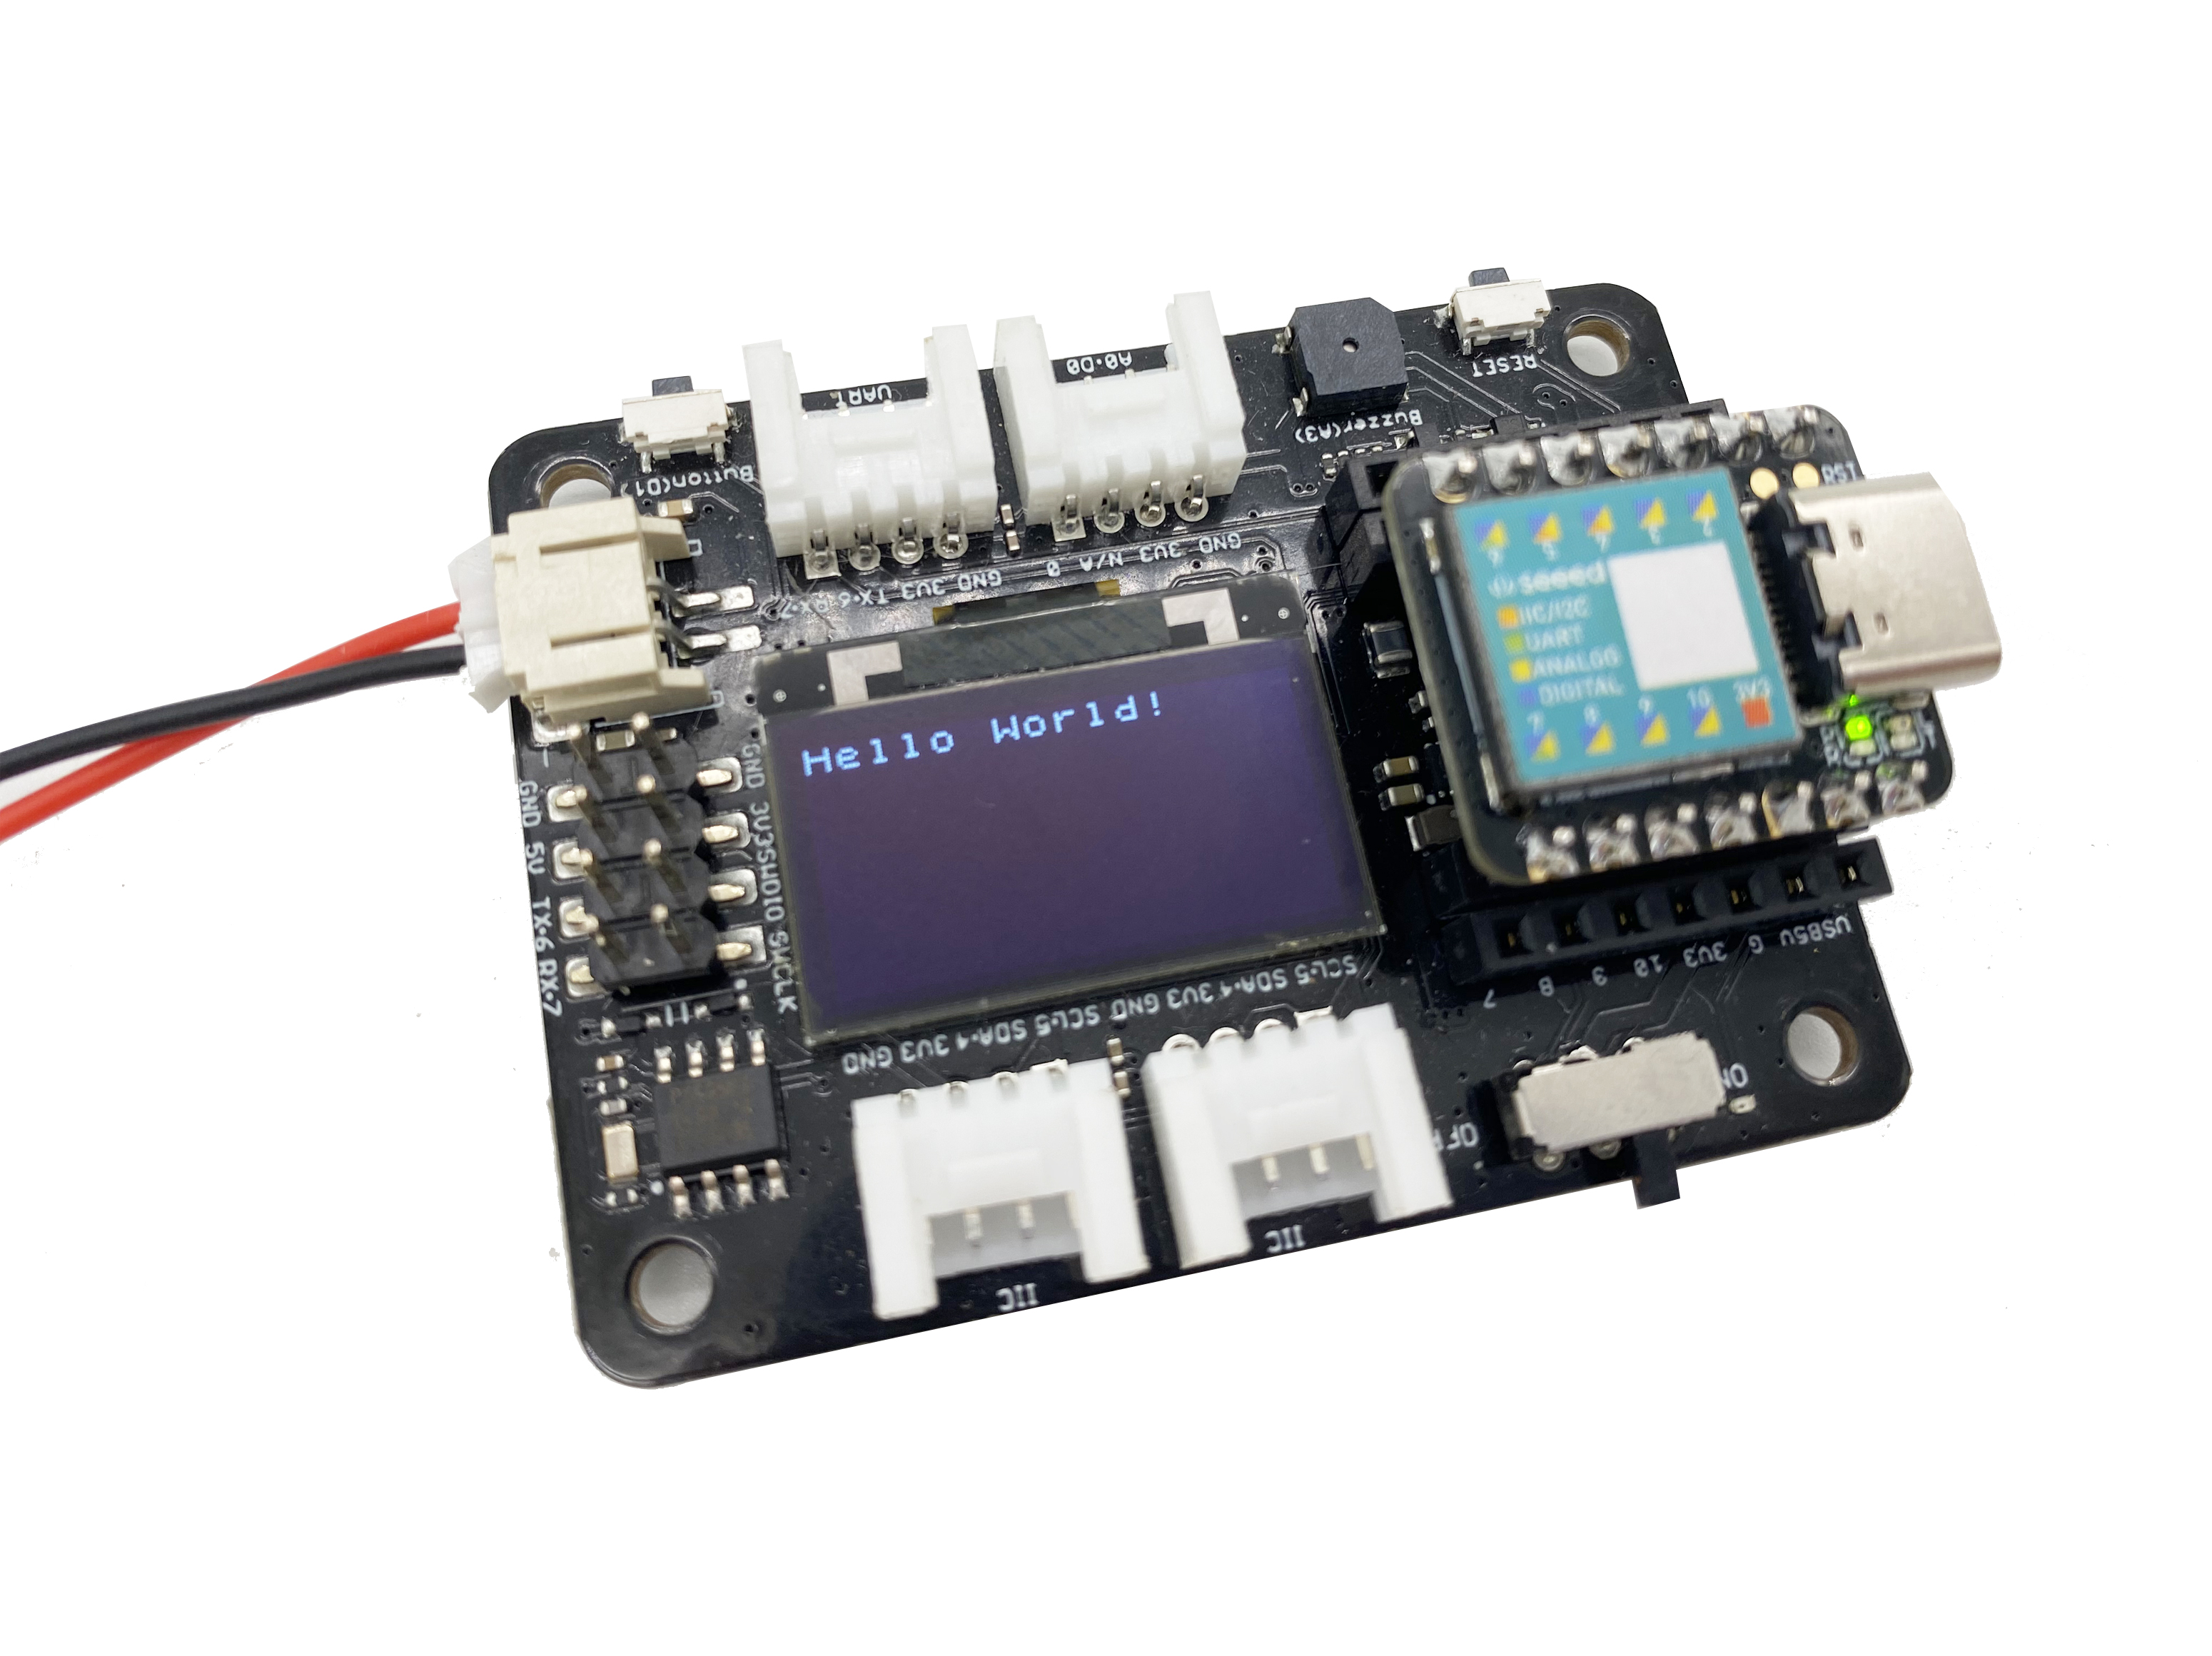
After the program is written, we connect the XIAO main control board to the computer interface using a data cable, as shown in the image below:
Click “Upload” to transfer the program to the main control board. Once the upload is complete, check if the OLED display shows “Hello World!”.
1.6.3 Task 2: Draw a Circle on the OLED Display
Analysis
To draw a circle on the OLED display, we need to use the U8g2 library. Programming involves four steps:
- Declare the
U8g2library file, determine whether to use SPI or I2C protocol, and set up the constructor to connect to the OLED display. - The
draw()function uses theu8g2.drawCirclefunction to draw a circle on the OLED. - Initialize the
U8g2library. - In the
loop()function, call related functions to draw images on the OLED.
Program Writing
Step 1: Declare the U8g2 library file, determine whether to use SPI or I2C protocol, and set up the constructor to connect to the OLED display.
#include<Arduino.h>
#include<U8g2lib.h>//Use U8g2 library

// Determine whether to use SPI or I2C protocol
#ifdef U8X8_HAVE_HW_SPI
#include<SPI.h>
#endif
#ifdef U8X8_HAVE_HW_I2C
#include<Wire.h>
#endif

U8G2_SSD1306_128X64_NONAME_F_HW_I2C u8g2(U8G2_R0, /* reset=*/ U8X8_PIN_NONE);
// Set up the constructor, define display type, controller, RAM buffer size, and communication protocol
Step 2: The draw()function uses the u8g2.drawCircle function to draw a circle on the OLED. The u8g2.drawCircle(x0,y0,rad,opt) function parameters are as follows:
x0,y0: The position of the center of the circle.rad: Defines the size of the circle, with the diameter of the circle being 2*rad+1.opt: Choose a part or all of the circle.
void draw(void) {
    u8g2.drawCircle(20, 25, 10, U8G2_DRAW_ALL);// Draw a full circle with a diameter of 21 at coordinates (20, 25)
}
Step 3: Initialize the U8g2 library.
void setup(void) {
    u8g2.begin();// Initialize the library
}
Step 4: In the loop() function, call related functions to draw images on the OLED. Use the firstPage and nextPage functions to cycle through image content. They need to be used together, as shown in the program below:
void loop(void) {
    // Cycle through image display
    u8g2.firstPage();
    do {
        draw();// Use draw function
    } while( u8g2.nextPage() );

    delay(1000);
}
Get this program from Github https://github.com/mouseart/XIAO-Mastering-Arduino-and-TinyML/tree/main/code/L6_DrawCircle_XIAO_en
Uploading the Program
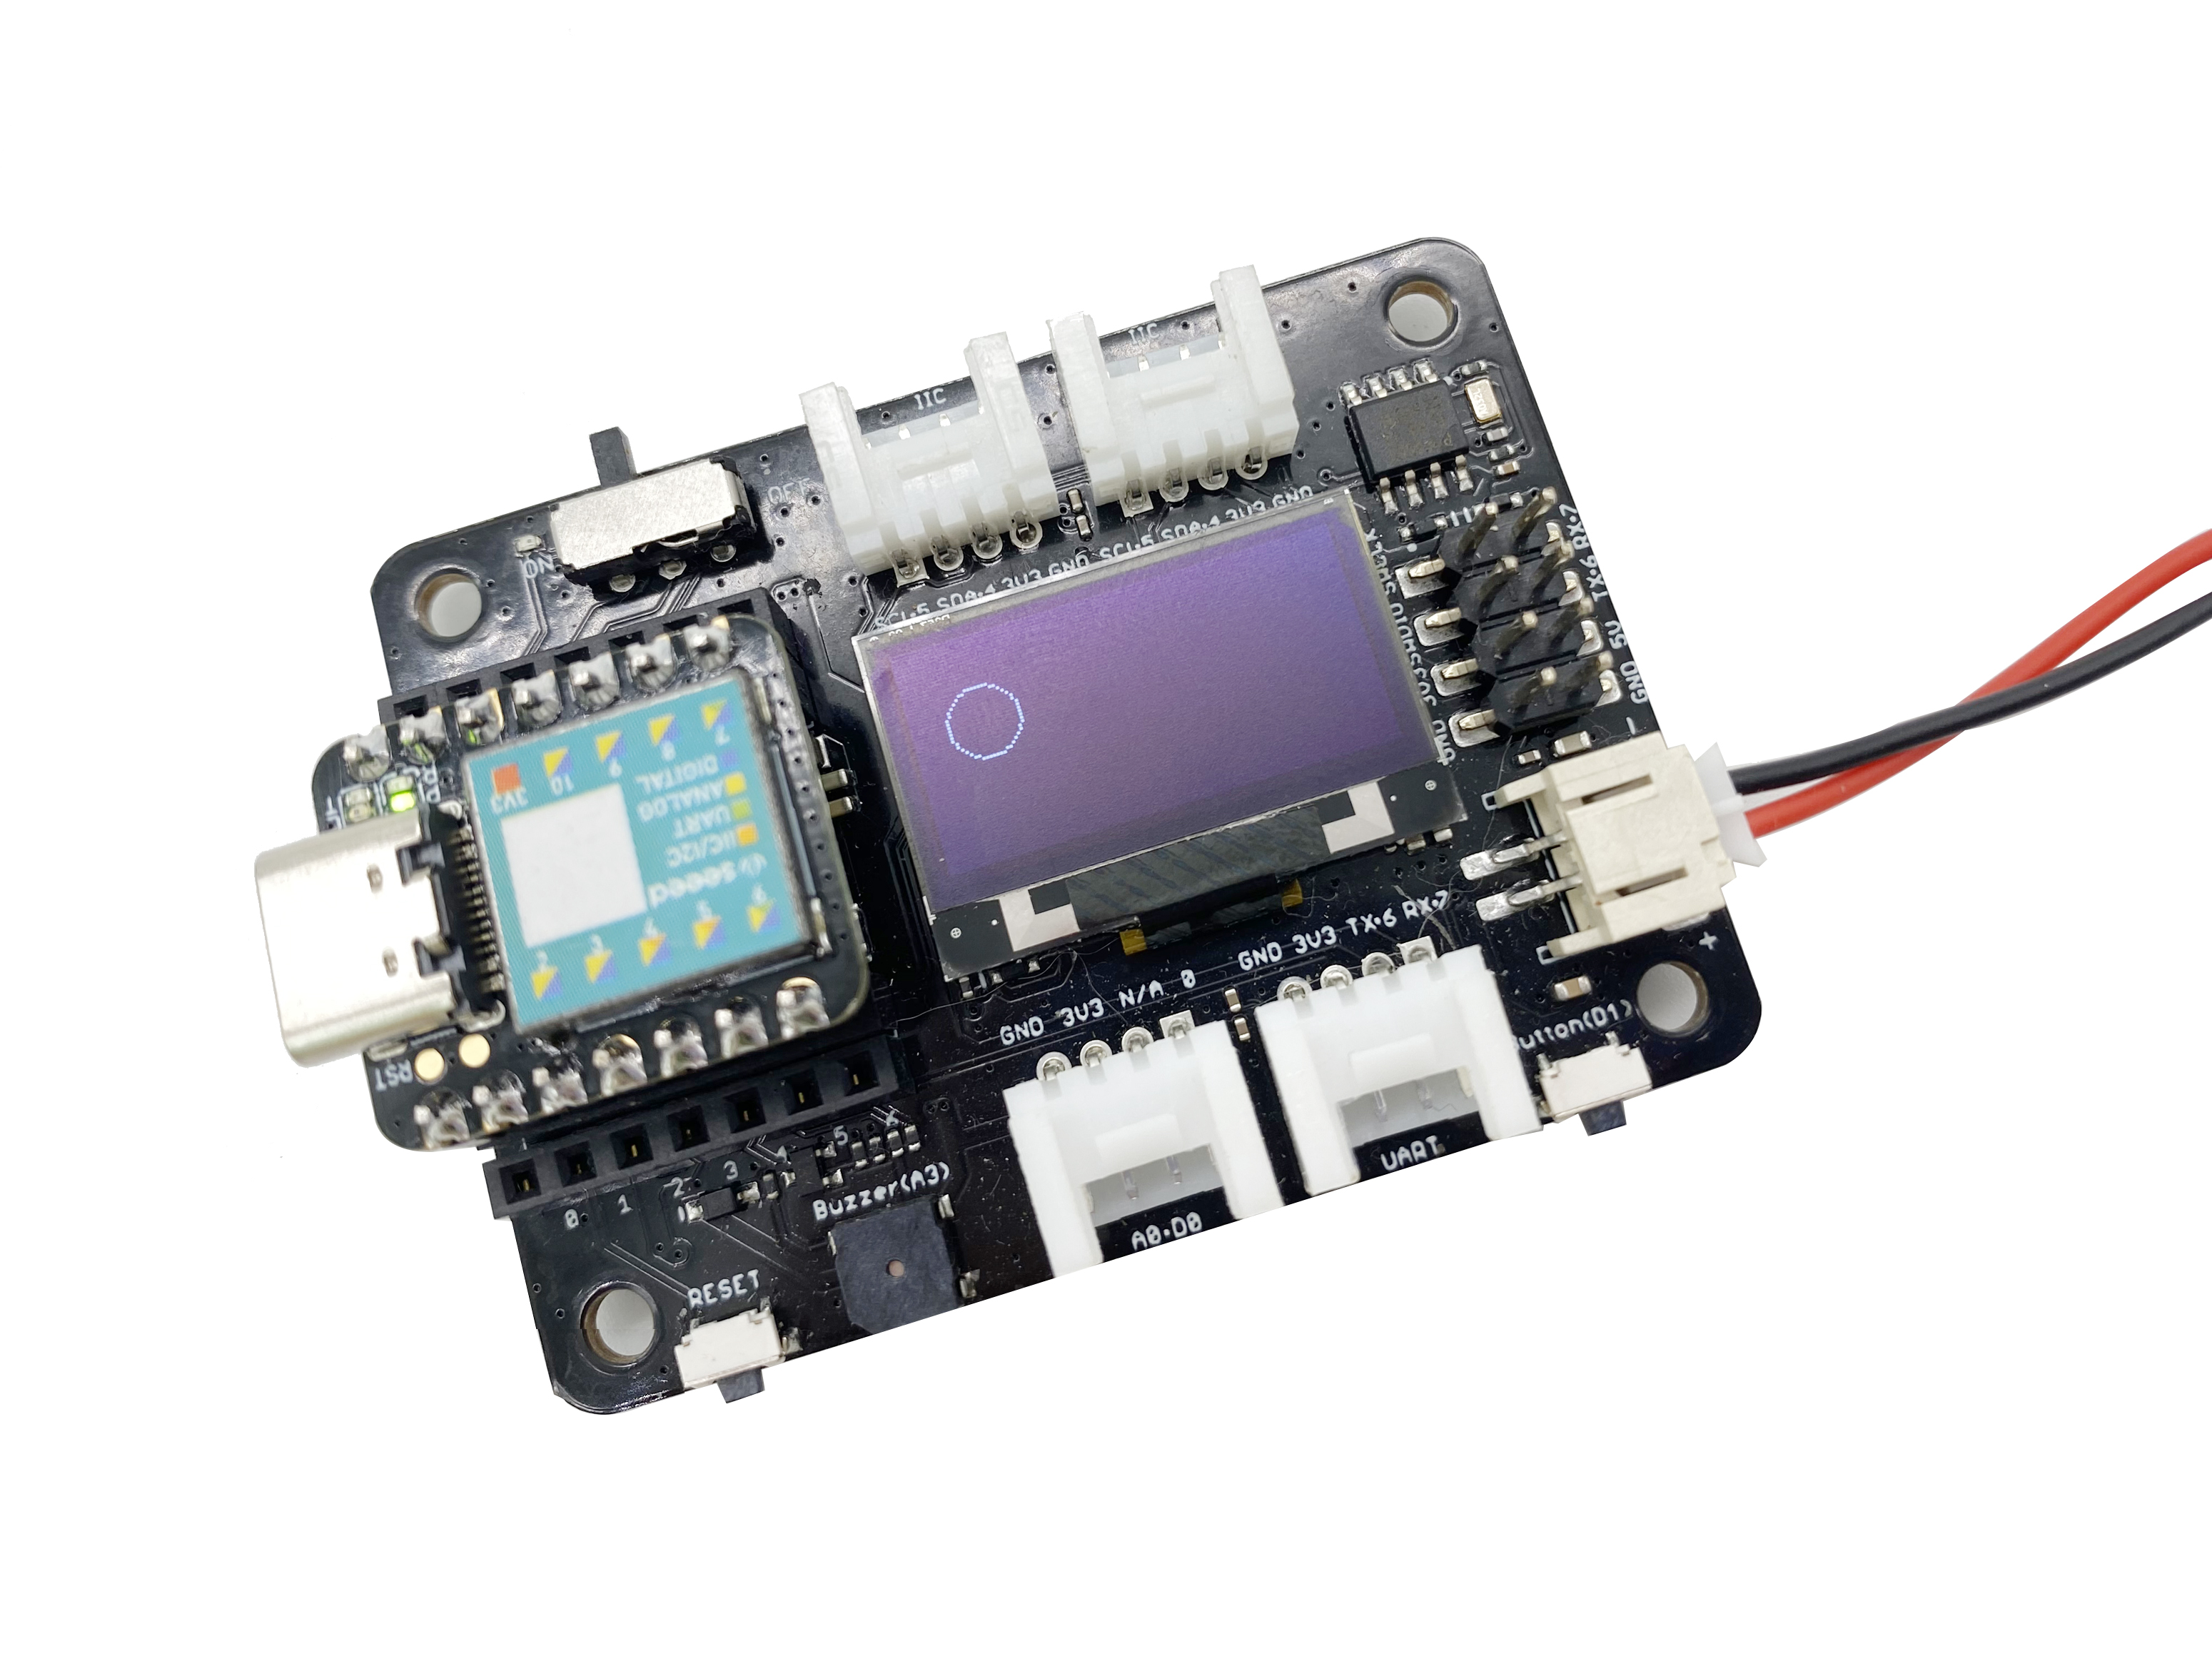
After writing the program, connect the XIAO main control board to the computer using a data cable, as shown below:
Once connected, click on the “Upload” button to upload the program to the hardware. When the debugging area displays “Upload Successful”, check if the OLED display screen has shown a circular pattern.
1.6.4 Extended Exercise
Try drawing some more complex patterns.